Connecting OIC ATP Adapter to ATP Database is required to insert data into the ATP Database tables from OIC. In this post I will show you the step-by-step process to configure the adapter. There are two main steps involved in configuring the ATP Adapter in OIC to connect to the Oracle ATP Database. Follow the steps below to configure the connection.
You can sign up for an OCI Cloud Free Tier. You can find more details here.
Gather Database Connection Details
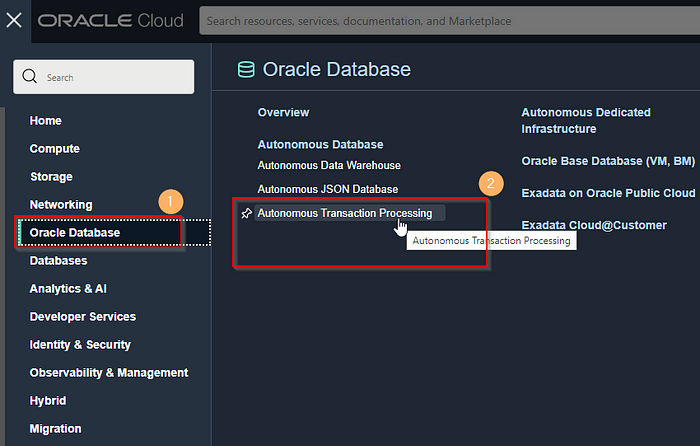
Login to the Oracle cloud account. Click on the Navigator / Hamburger icon on the top left and select Oracle Database > Autonomous Transaction Processing as shown below.
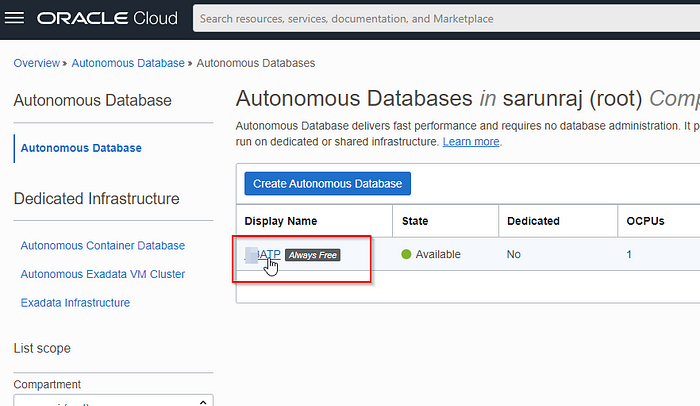
In the next page you will see a list of Databases. Click on the Database Display name.
You will be presented with a page where you have the Database details and few tabs where you can find more details. We have to find the connection details and download the client credentials (wallet).
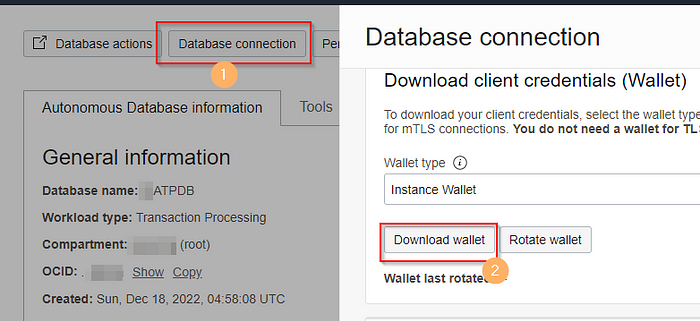
Click on the Download Wallet button. You will have to enter the wallet password. This password is used during the configuration of the ATP Connection in OIC.
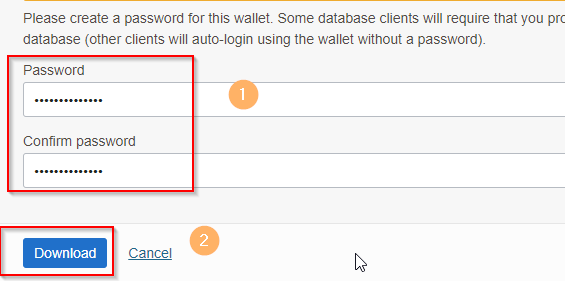
Enter the Wallet password and click on the Download button. This will download a “zip” file to your system. Make sure to save the file as well as the wallet password.
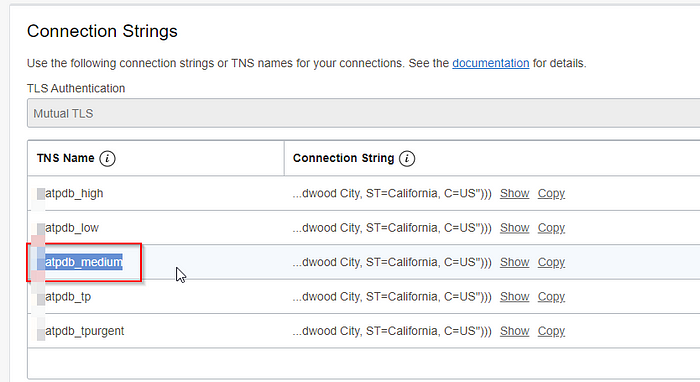
Scroll down in the same window and select one of the TNS Name values. I chose the one highlighted below.
Configure the Connection in OIC
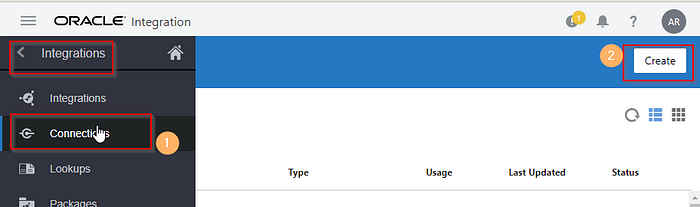
Our next steps is not configure the connection in OIC. Navigate to Integrations > Connections and click on “Create” button.
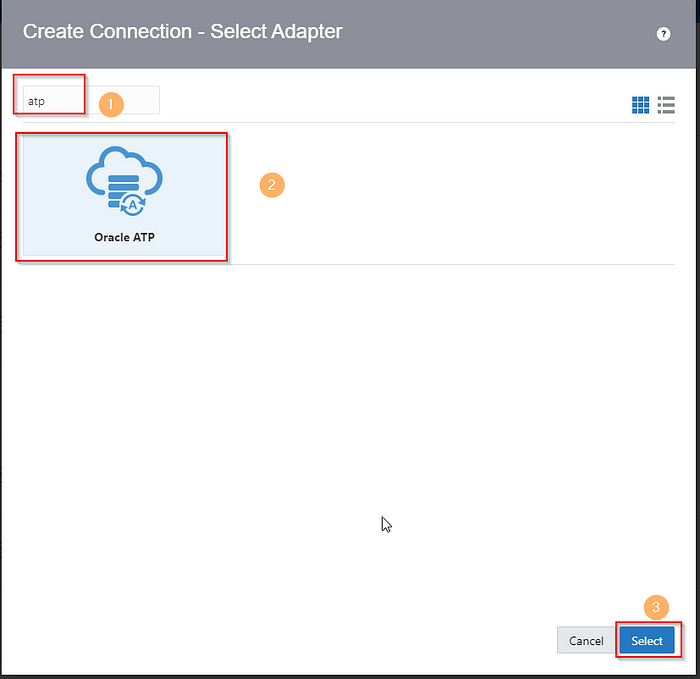
In the list of Adapters, go ahead and search for “atp”. You will notice the Oracle ATP Adapter. Click the adapter and click on “Select” button.
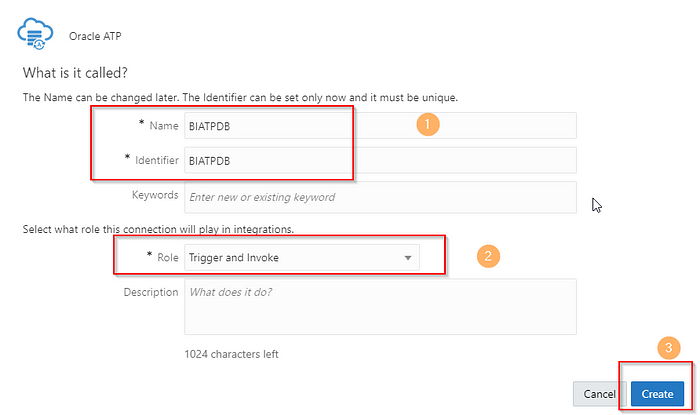
Provide the Name and Identifier for your connection. Click on Create button.
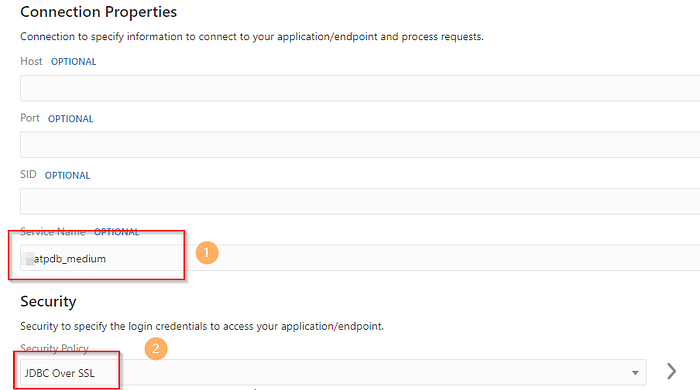
In the next window copy and paste the TNS Name you chose in the Service Name field. Make sure to select the Security policy as “JDBC Over SSL”.
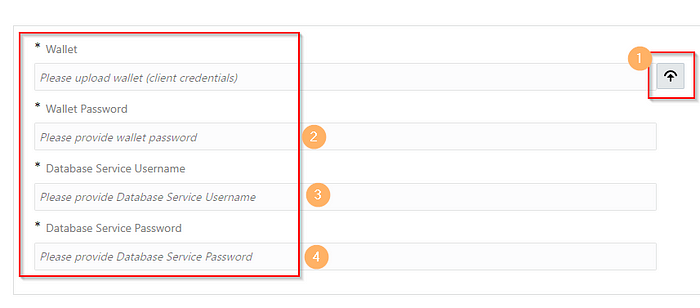
You will see the option to upload the Wallet file from your system. Go ahead and upload the file and provide the following details:
- Wallet Password
- Database Service User Name
- Database Service Password
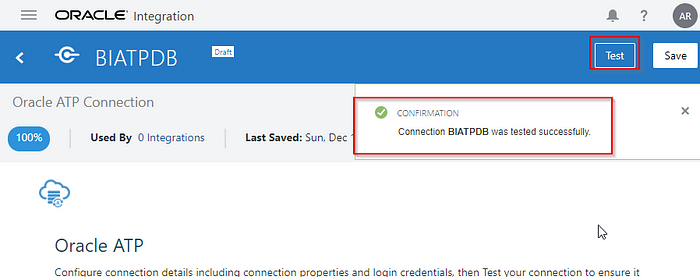
Now go ahead and click the “Test” button. If all the details are correct you will see the Confirmation message as shown below. Make sure to click the Save button to save the connection.
Hopefully you are able to follow the steps in the tutorial and setup your connection in OIC. I am working on a YT tutorial video to show you how to:
- invoke the BI Publisher Report
- Write the data to ATP Database Table
Make sure to subscribe to the YT channel and watch the previous videos on OIC.